Honda Civic Emission Test Failure & Fuel Saver Gadgets
Elias Thorne
2/23/202614 min read
Most cheap fuel saver gadgets plugged into your Honda Civic's OBDII port are ineffective placebos that can interfere with ECU communication, trigger emission warning lights, and cause automatic MOT visual inspection failures. Remove any aftermarket OBDII devices, check your fuel cap seal, inspect for exhaust manifold cracks that mimic catalyst failure, and complete a proper drive cycle before retesting.
What Is "Failed State Visual Inspection" in UK MOT Testing?
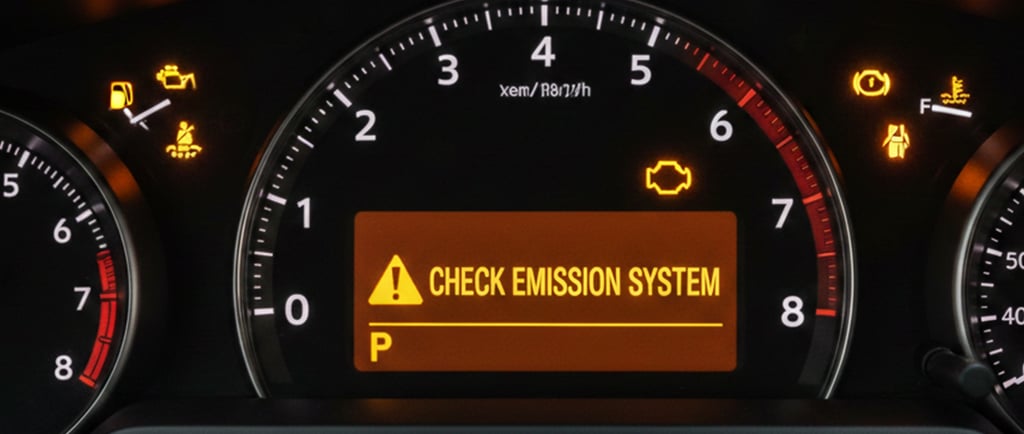
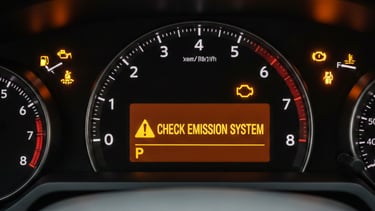
A failed state visual inspection means your Honda Civic has visible emission system defects or warning lights illuminated during the MOT examiner's physical check, including dashboard emissions warnings, missing catalytic converters, exhaust system damage, or OBDII readiness monitors showing not ready status.
In UK MOT testing, the visual inspection is the first line of defense against emission system failures. Unlike the actual emission gas analysis, this inspection doesn't require specialized equipment—the examiner physically looks at your exhaust system, checks for obvious tampering, and crucially, observes your dashboard.
If your engine management light, emission system warning, or any related indicator is illuminated when you turn the ignition to position II, you've already failed before the tester even touches your car. The MOT handbook is explicit: any emission-related warning lamp showing during the test is an automatic major defect.
There's another critical aspect many Honda Civic owners miss: the OBDII readiness monitors. If you've recently disconnected your battery, cleared fault codes, or installed gadgets that reset the ECU, your car enters a "not ready" state. UK MOT testers can see this immediately with their diagnostic equipment. Your emission monitors need to show "ready" status across multiple systems—catalyst efficiency, oxygen sensors, evaporative system, heated catalyst. If too many show "not ready," that's also a failed visual inspection before any tailpipe testing begins.
I've seen this exact scenario at least a dozen times in my workshop. A Civic owner comes in frustrated after failing MOT, insisting their car "runs perfectly." We plug in the scanner, and sure enough—three monitors showing not ready, plus a pending P0420 code that hasn't triggered the light yet. Nine times out of ten, they'd either installed some "eco chip" the week before, or panic-cleared codes the morning of the test thinking they were being clever.
The visual inspection also covers physical components. Examiners check for:
Fuel Saver Gadgets: Miracle Solution or MOT Disaster?
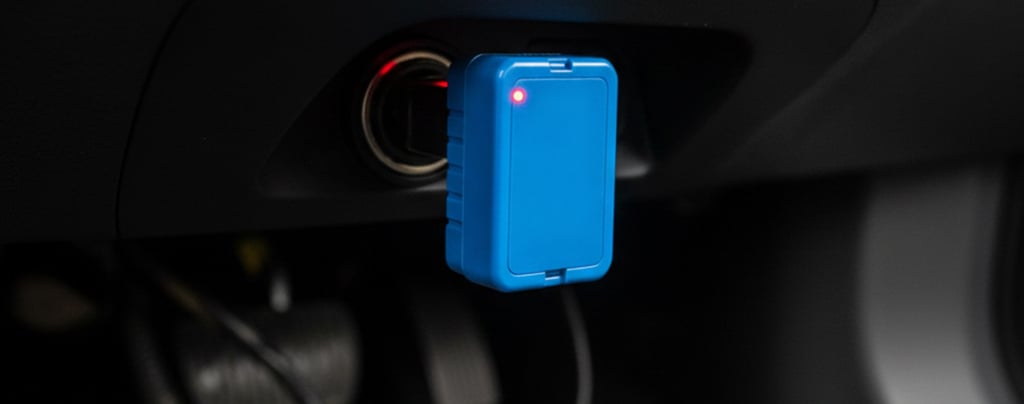
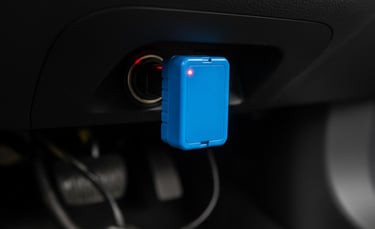
Most OBDII-port fuel saver devices sold online are scientifically baseless scams that cannot improve fuel economy and frequently cause ECU communication errors, triggering emission warning lights that guarantee MOT failure.
Let's be direct about this: the magnetic fuel savers, OBDII "eco chips," and plug-in "performance boosters" flooding Amazon and eBay are overwhelmingly fraudulent. I'm not talking about legitimate engine remapping or professional fuel system modifications—I mean the fifteen-quid devices promising thirty percent fuel savings with "quantum magnetic alignment" or similar nonsense.
Here's what actually happens when you plug these into your Honda Civic's diagnostic port. Your OBDII port carries critical data between sensors, the ECU, and diagnostic equipment. It's a live communication bus running on specific voltage protocols (ISO 9141-2 or ISO 14230 on most Civics). Many of these cheap devices simply light up LEDs to create the illusion of function while doing absolutely nothing. The better-engineered scams actually attempt to intercept ECU signals, often sending false data to make your fuel economy gauge read optimistically.
The problem emerges during MOT testing. When the examiner plugs in their diagnostic tool, it may fail to communicate properly with your ECU because some aftermarket gadget is squatting on the data pins. Or worse, the device has already triggered fault codes by sending corrupted signals that your ECU interprets as sensor malfunctions.
I heard a 2009 Civic Type R come through last year—owner swore his "magnetic fuel optimizer" was saving him money. The device had been gradually corrupting oxygen sensor readings for months. By MOT time, his catalyst efficiency monitor was showing permanent failure, and he needed a new catalytic converter. A forty-pound scam cost him over eight hundred pounds in repairs plus the inconvenience of failed MOT and time off work for the retest.
The physics doesn't work either. Magnetic devices clamped to fuel lines claim to "align fuel molecules" for better combustion. Petrol molecules aren't magnetic. Permanent magnets cannot alter hydrocarbon combustion chemistry. In fact, technical comparisons of FuelMarble vs magnetic savers like Fydun demonstrate clearly that simple magnets have zero measurable effect on modern fuel injection systems, often serving only as a placebo.
The OBDII "eco chips" are even more insidious because they appear technical. Most contain nothing but a voltage regulator and some LEDs. A few actually have microcontrollers, but they're programmed to do nothing except blink patterns that make owners think something is happening. The ones that do attempt to modify engine parameters typically cause more problems than they solve—rough idle, hesitation, increased fuel consumption as the ECU fights against bad inputs.
Common Honda Civic Emission System Problems Beyond Gadgets
The most frequent emission failures in Honda Civics stem from loose or damaged fuel caps, failing oxygen sensors, deteriorating catalytic converters, exhaust manifold cracks that mimic catalyst failure, and contaminated mass airflow sensors—all legitimate mechanical issues requiring proper diagnosis and repair.
Visual Inspection Checkpoints: Fuel Cap and Exhaust System
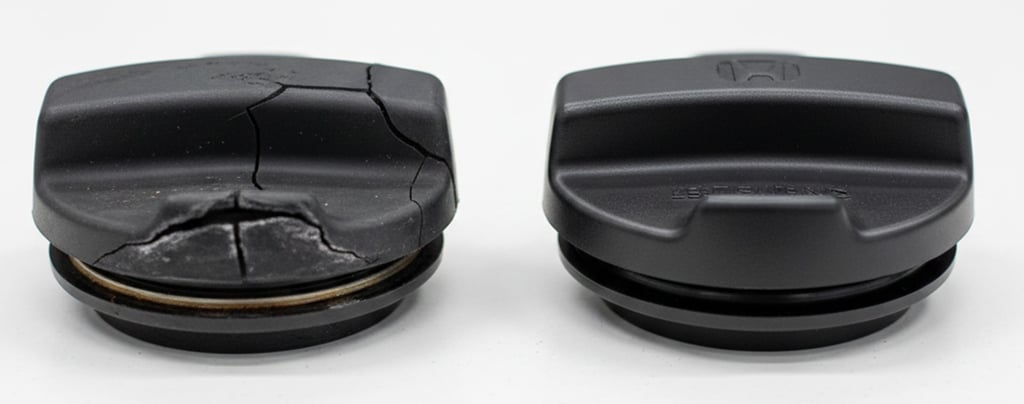
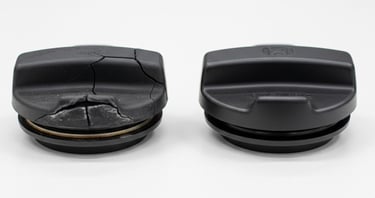
Your fuel cap is the single cheapest and most common emission system failure point. The rubber seal degrades over time, especially in the UK's temperature fluctuations and damp conditions. When the seal fails, your evaporative emission system cannot maintain proper pressure. The EVAP monitor detects this as a leak, triggers a P0455 or P0457 code, and illuminates your emission warning light.
During visual inspection, check your fuel cap for:
Cracks or splits in the rubber gasket
The internal spring mechanism clicking at least three times when tightening
Any deformation of the cap body itself
Corrosion around the seal surface on the fuel filler neck
I keep a box of genuine Honda fuel caps in the workshop because this fix is so common and so simple. Ten pounds for the part, thirty seconds to install, then a proper drive cycle to clear the code. Yet I've seen owners waste hundreds on diagnostic fees at dealers who should have spotted this immediately.
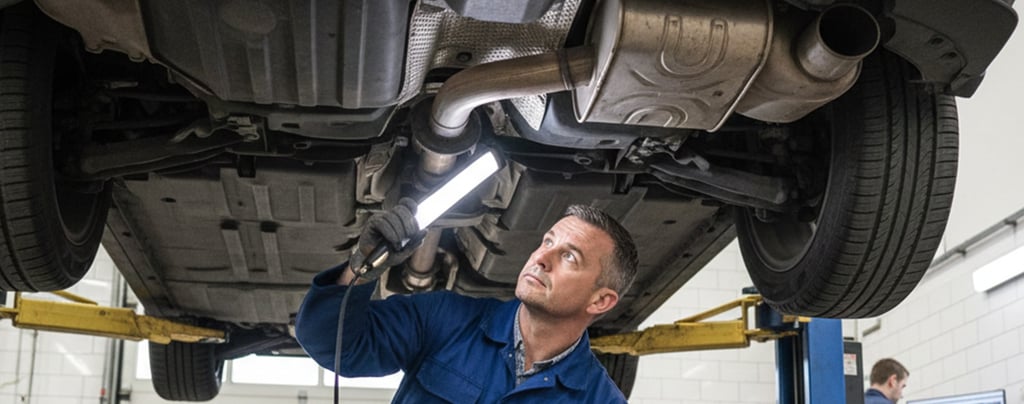
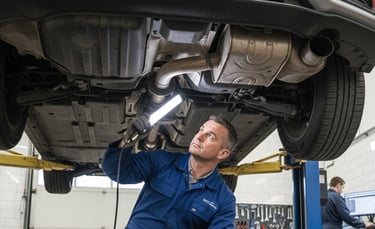
For exhaust system visual checks, focus on:
Catalytic Converter Condition: Look underneath for obvious heat damage, rattling (indicating internal substrate failure), or physical damage from speed bumps. Eighth-generation Civics (2006-2011) are particularly prone to catalyst deterioration after 100,000 miles, especially if the engine has been running rich due to other faults.
Exhaust Manifold and Downpipe—Critical Diagnostic Point: Check for crack-induced leaks, especially where the manifold meets the head. This is absolutely crucial because exhaust manifold cracks on Honda Civics are common and will throw the exact same fault codes as a failed catalytic converter.
Here's what happens: a hairline crack develops in the manifold casting or at the flange gasket interface. Exhaust gases escape before reaching the upstream oxygen sensor. The sensor reads lean because it's partially sampling outside air mixing with exhaust. The ECU sees this discrepancy between upstream and downstream sensors and logs P0420 (Bank 1) or P0430 (Bank 2) catalyst efficiency faults.
Many Civic owners have been sold catalytic converters they didn't need because the diagnostic process stopped at the code reading. A proper check requires visual inspection of the manifold under the heat shield, checking for carbon tracking (black staining showing where gases escape), and sometimes using smoke testing equipment to pressurize the exhaust and reveal cracks.
On eighth and ninth-generation Civics, check these specific areas:
The manifold-to-cylinder head flange (torque specs are critical here; over-tightening during previous repairs can crack the manifold)
The collector area where runners merge
Heat shield mounting points where stress cracks develop
If you see a P0420 or P0430 code, don't immediately assume catalyst failure. Inspect the manifold first. If you find cracks, repair costs are two hundred to four hundred pounds for manifold replacement versus eight hundred to a thousand pounds for a catalyst you didn't need.
Visible Smoke During Cold Start: Blue smoke indicates oil burning (worn piston rings, valve seals, or turbo seals on the Type R). Black smoke suggests overfueling (MAF sensor contamination, injector issues, or air filter restrictions). Either will fail the opacity test portion of MOT.
The P0420/P0430 Diagnostic Trap: How to Avoid Unnecessary Catalyst Replacement
P0420 and P0430 codes indicate catalyst efficiency below threshold, but on Honda Civics these same codes frequently result from exhaust manifold cracks or failing oxygen sensors rather than actual catalyst failure. Always diagnose exhaust leaks and sensor function before replacing expensive catalytic converters.
This deserves its own section because it's where Civic owners waste the most money on emission repairs.
When your scanner shows P0420 (Bank 1 catalyst efficiency) or P0430 (Bank 2 on V6 models), the code description literally says "catalyst system efficiency below threshold." Naturally, most people assume the catalyst has failed. Parts suppliers and less scrupulous garages are happy to sell you an eight-hundred-pound replacement.
But here's the diagnostic truth: that code means the ECU has detected an efficiency problem based on comparing upstream and downstream oxygen sensor readings. Multiple factors can cause this sensor comparison to fail:
Exhaust Leaks Upstream of Sensors: As covered above, manifold cracks are the prime culprit. The upstream O2 sensor reads lean due to air intrusion. The ECU thinks the catalyst isn't processing exhaust properly when actually it's just reading contaminated data.
Failing Oxygen Sensors: On Civics with 80,000-plus miles, the upstream O2 sensor can become sluggish or drift out of calibration. It sends slower or inaccurate voltage signals. The ECU compares this against the downstream sensor and sees a discrepancy that mimics catalyst failure. A new upstream O2 sensor costs seventy to one hundred pounds versus eight hundred for a catalyst.
Actual Catalyst Deterioration: Yes, catalysts do fail, especially if the engine has been running rich for extended periods (washing unburned fuel through the catalyst matrix), or if the car has been driven through deep water while the catalyst was hot (thermal shock cracks the ceramic substrate).
Proper Diagnostic Sequence:
Check for exhaust leaks visually and with your hand near the manifold joints during cold start
Monitor live oxygen sensor data with a scanner—upstream sensor should show rapid switching between 0.1V and 0.9V when warmed up
Check downstream sensor—should show stable voltage around 0.45V with minimal switching
If sensors respond properly and no leaks exist, then consider catalyst replacement
A customer four hundred pounds last month with this exact diagnosis on a 2008 Civic. This isn't an isolated case; we've documented substantial gains on similar platforms, such as the 18% efficiency improvement on a 2007 Honda Accord achieved through proper mechanical optimization rather than electronic trickery. In the Civic's case, I found a cracked exhaust manifold at the number three cylinder runner. Replaced the manifold, code cleared, and MOT passed.
The tell-tale sign during inspection: you'll often see black carbon deposits streaking down from the crack point. Use a torch to look under the heat shield. If you see carbon tracking, you've found your leak.
How to Fix "Check Emission System" Warnings and Pass MOT
Remove all aftermarket OBDII devices, verify your fuel cap is properly sealed, inspect for exhaust manifold cracks before assuming catalyst failure, drive at least fifty miles using motorway and city conditions to complete readiness monitors, then use a professional scanner to confirm all systems show ready and identify specific fault codes before replacing any parts.
Step 1: Remove Any Non-Factory OBDII Devices Immediately
Unplug every aftermarket device from your OBDII port—fuel savers, code readers left connected, insurance telematics dongles (if removable), Bluetooth adapters you forgot about, anything. These can interfere with MOT tester communication even if they're not actively causing faults. I've seen test failures purely because the examiner's equipment couldn't establish connection with the ECU through a cheap Amazon dongle someone left plugged in.
Store these devices away from the vehicle entirely. Some cheaper units have been known to drain batteries even when the car is off because they draw standby current.
Step 2: Inspect and Secure the Fuel Cap
Remove your fuel cap completely and examine the rubber seal in good light. If you see any cracks, compression marks that don't spring back, or the seal feels hard and brittle rather than pliable, replace it. Genuine Honda caps cost around ten to fifteen pounds from dealers or quality motor factors.
After refueling, turn the cap until you hear at least three distinct clicks. This ensures the ratchet mechanism has properly seated and the seal is compressed. A loose cap is one of the most common causes of P0455 (large EVAP leak) codes.
Step 3: Perform Critical Visual Diagnostics Before Driving
Before you start the drive cycle, check for issues that won't clear themselves:
Exhaust Manifold Crack Check: Get the car cold, then have someone start it while you listen near the manifold. A leak will produce a distinct ticking or hissing sound that changes with engine RPM. Use a torch to look for carbon tracking under heat shields.
Oxygen Sensor Wire Inspection: Check that O2 sensor wires aren't damaged, melted against exhaust components, or corroded at connectors. These sensors operate at high temperatures and wire insulation degrades over time.
Air Filter Condition: A severely clogged air filter can cause rich running and trigger emission codes. This is a two-minute check that eliminates one variable.
Step 4: Complete a Proper Drive Cycle
Your Honda needs to run specific driving conditions to set all emission monitors to "ready." This isn't just driving around the block. A complete Civic drive cycle typically requires:
Cold start (engine off for at least eight hours, coolant below 50°C)
Idle for two to three minutes to reach closed-loop fuel control
Steady motorway driving at 50-60 mph for at least ten minutes for catalyst and oxygen sensor monitors
City driving with multiple stops and accelerations for EVAP purge testing
Another motorway run to finalize catalyst monitor
You'll need to accumulate roughly fifty to one hundred miles of varied driving. Avoid short trips or constant motorway-only driving. The ECU needs to see temperature changes, varying loads, throttle transitions, and closed-loop fuel control conditions to complete all monitors.
The specific monitors that must show ready for UK MOT:
Catalyst monitor
Oxygen sensor monitor
EVAP system monitor
Heated catalyst monitor (on newer models)
The only monitor allowed to show "not ready" during MOT is the EVAP monitor on some test equipment, but this varies by tester interpretation. Don't risk it—complete the full cycle.
Step 5: Use a Proper Scanner to Read Specific Fault Codes and Monitor Status
If your warning light remains on after the drive cycle, you have a genuine fault that requires repair. Don't guess—read the actual code. The code will point you toward the affected system:
P0420/P0430: Catalyst efficiency (but check manifold cracks and O2 sensors first as detailed above)
P0171/P0174: System running lean (vacuum leak, failed MAF sensor, or exhaust leak before O2 sensor)
P0172/P0175: System running rich (leaking injectors, failed MAF sensor reading low, excessive fuel pressure)
P0455 through P0457: EVAP system leaks (fuel cap, purge valve, charcoal canister, or vapor lines)
P0133/P0134: Slow or no response from oxygen sensors (sensor aging, wiring issues, or exhaust leaks)
Many Halfords locations offer free code reading, or you can purchase a basic Bluetooth OBDII scanner for twenty to thirty pounds that works with smartphone apps like Torque Pro. The key is getting the specific code so you can target the actual problem, not symptoms.
More importantly, check your readiness monitor status. In Torque Pro or similar apps, look for "I/M Readiness" or "Monitor Status." You need to see "Ready" or "Complete" for all applicable monitors. If they show "Not Ready" or "Incomplete," continue the drive cycle.
Step 6: Address Root Causes, Not Symptoms
I had a 2008 Civic Type R come through my bay three years back. Owner had failed MOT on emission warning light. He'd bought one of those magnetic "fuel conditioner" rings you clamp around the fuel line, plus an OBDII "eco maximizer" from Amazon. Both installed the week before his MOT, thinking he was being proactive about fuel economy.
The gadgets had done nothing except give him false confidence. When I scanned it, I found a pending P0420—catalyst efficiency fault—plus two monitors stuck in not-ready status because the OBDII device kept interrupting the diagnostic routine every time the ECU tried to complete its checks.
I removed both gadgets, then did proper diagnostics. The P0420 wasn't actually a failed catalyst. I found a hairline crack in the exhaust manifold at cylinder two, right where the runner welds to the collector. You could see the black carbon tracking once I removed the heat shield. The crack was allowing air to enter before the upstream oxygen sensor, confusing the ECU into thinking the catalyst wasn't working.
Replaced the manifold with a quality aftermarket unit, cleared the codes, ran the proper drive cycle over two days, and he passed the retest. Total cost was two hundred fifty pounds for the manifold and labor. If he'd gone to a dealer or less thorough garage, they'd have sold him an eight-hundred-pound catalyst he didn't need, and he still would have had the underlying manifold crack causing problems down the road.
That's the difference between reading codes and actually diagnosing root causes.
Now Here's What Most Mechanics Won't Tell You About Fuel Economy
You removed the snake-oil gadget. You fixed the emission fault—whether it was a simple fuel cap or a more complex manifold crack. Your Civic passed MOT. But you still want better fuel economy—that's why you bought the useless magnetic device in the first place.
The real issue isn't some missing miracle product. It's incomplete combustion in your engine, which is why you're burning more fuel than necessary and why your emission system is working overtime to clean up inefficient burn.
Think about what's actually happening in your combustion chamber. Your fuel injectors spray petrol as a fine mist, but even modern multi-hole injectors create droplets of varying sizes. Larger droplets—anything above 20 microns—don't vaporize completely before ignition. They burn on the surface while the core remains liquid, wasting potential energy. Your oxygen sensors are constantly adjusting fuel mixture to compensate for this combustion inefficiency, your catalyst is processing excess unburned hydrocarbons, and you're getting fewer miles per tank while accumulating carbon deposits that worsen the problem over time.
This is exactly why aftermarket gadgets fail. Magnets can't change droplet size. OBDII chips can't improve atomization. Electronic pulse devices can't alter fluid mechanics. You need to address the physical fuel preparation before it reaches the combustion chamber. Understanding how fuel enhancement technology actually works reveals that the key lies in altering fluid mechanics and engineering, not pseudoscience.
If you're serious about improving your Honda Civic's fuel economy while maintaining emission system health for future MOT tests, explore the FuelMarble S-Size unit designed for passenger cars. It's the difference between addressing the actual combustion process with engineering versus hoping a fifteen-quid gadget will magically solve complex thermodynamic problems.
Conclusion: Skip the Gimmicks, Focus on Proper Maintenance and Engineering
The fuel saver gadget market thrives on desperation and scientific illiteracy. Your Honda Civic doesn't need quantum magnetic realignment or OBDII miracle chips. It needs what every internal combustion engine needs: clean air intake, proper fuel delivery, functional sensors, leak-free exhaust systems, and efficient combustion.
When your emission warning light appears or you fail MOT visual inspection, resist the temptation to throw cheap gadgets at the problem. Get proper diagnostics. Fix the actual fault—whether that's a ten-pound fuel cap, a two-hundred-fifty-pound manifold, or legitimately replacing a failed catalyst when diagnostics confirm it's actually needed. Instead of looking for magic bullets, owners should focus on proven fuel saving tips to improve economy, which prioritize maintenance and driving habits over plastic gadgets.
Remember the diagnostic hierarchy:
Check the obvious and cheap first (fuel cap, visual leaks)
Read actual fault codes with proper equipment
Diagnose root causes before replacing expensive parts
Complete proper drive cycles after repairs
Verify monitor readiness before MOT retest
The path to better fuel economy and reliable MOT passes runs through regular maintenance, addressing problems at their source with proper diagnostics, and if you're committed to efficiency improvements, investing in engineering-validated solutions like FuelMarble rather than Amazon gadgets that couldn't pass basic physics review.
Your Civic will reward proper care with years of trouble-free motoring and easy MOT passes. The fifteen-quid magnetic snake oil will reward you with exactly nothing except potential repair bills and wasted time at retest centers.
Disclaimer: All vehicle maintenance, modification, and testing information provided in this guide is for educational purposes and should be conducted in accordance with UK Government driving and transport regulations as published by the Driver and Vehicle Standards Agency (DVSA) and Department for Transport (DfT); always consult official UK MOT testing standards at gov.uk/guidance/mot-inspection-manual-for-private-passenger-and-light-commercial-vehicles and ensure any fuel system modifications comply with current Road Vehicles (Construction and Use) Regulations before installation.
Designed to Go Further
Contact
FuelMarble © 2026. All rights reserved.
Delivery
Household
Marine
FuelMarble, 124 City Road, London, EC1V 2NX